Recipe Swap – Hot Toddy

I was under the weather this past week with a miserable cold and cough.  I wasn’t sure at first if it was allergies or a cold, but after a few days of horrible coughing I knew it was a chest cold.  Anyone that knows me knows I hate taking medicine, especially long term.  I did take something for the cough, but it really wasn’t helping all that much.  When all else didn’t work, I channeled my inner German/Irish grandmother and made myself a cup of hot toddy.  I couldn’t believe how much relief I got from that cup of tea.  I slept like a baby and didn’t cough during the night.

The next few days I had a cup or two of this mix and my chest cleared.  I do still cough occasionally, but overall am feeling better.  Those old wives tales sure do come in handy sometimes.  Here’s the recipe I used for my toddy.

Laura’s Hot Toddy

Ingredients

  • Organic green tea
  • 1/4 tsp raw organic honey
  • 1 tsp organic lemon
  • 1 tsp Bragg’s Apple Cider vinegar
  • 1-2 tbsp Slivovitz (you can use Jack Daniels instead)
  • 1 sprinkle of Cayenne pepper

Directions

  1. Boil the tea and steep for 3 minutes
  2. Add all ingredients and stir
  3. Sip and enjoy the warmth (I love the Cayenne pepper heat)

My first cup, I admit to using a full shot of the Slivovitz to aid my sleep and it worked like a charm.  First relief I had in days.  If you don’t want any alcohol (though over the counter medicines contain it too) you can eliminate the alcohol and up the sprinkle of pepper.

Do you have a home cold remedy recipe to share?  Please comment in the box below, I’d love to hear about new remedies.  If you try mine, let me know what you think.

Prince of Peace Organic Green Tea 100 Tea Bags


Madhava Natural Sweeteners Organic Raw Honey, 22-Ounce


Simply Organic Cayenne Pepper Certified Organic Containers – 2.89 Oz


Bragg Organic Raw Apple Cider Vinegar, 16 Ounce – 1 Pack


Santa Cruz Organic Original Lemonade, 1 Quart

**Due to the alcohol in this recipe I do not recommend using with children, especially under the age of 18.  

Necessary Revisions

What’s getting in the way of your fitness growth?  Is it the bullshit stories you tell yourself?  Is your actual training plan causing you to lose motivation?  Lately, for me, it’s been a little of both, with a sprinkle of injury mixed in.

Running is often a solitary activity which challenges you on so many levels.  I’ve personally pounded thousands of miles these past two years alone.  This gives me a lot of time to think and get in touch with myself, but it also can be lonely.  While I don’t truly mind a nice long run with my music, there’s nothing like a nice long run with your running friends.  Time goes by so fast when you’re chatting it up and as an added bonus it takes your mind off the other stuff that comes up when running alone.

The problem I’ve had this past year, aside from injury, is that I was doing heart rate training.  This training really forced me to avoid group runs as I’ve had to slow my pace to a crawl to keep my heart rate in the right zone.  Worse still, it’s taken some of the fun and joy out of running for me.  I thought it was the training itself and slow pace of it that bothered me lately, but realize now it’s the connection to people I’m missing most.  Like everything else in life, human connection sparks excitement and motivation.  I’m missing my running tribe.

I’ve decided to rethink some of my training because I’m feeling like I’m in a running slump.  I’m losing motivation because I’m not feeling like I’m part of anything beyond solitary miles of running.  I miss running on the boardwalk with my running friends and running without constantly checking my HR watch to see if I’m in the right zone.  I’ve made running have way too many rules and somehow lost its joy in the process.  It’s time to take back control over how I train and find some balance in my plan.

First, I need to connect to people during some of my runs and move away from worrying that doing that would violate some HR rules.  On these runs, I plan to leave my HR chest strap home and concentrate on the beautiful scenery and conversation.  I also have some running clubs that I joined last year and  while I participated in online conversation, I never went to one run because I was worried about the plan I was doing and the targets I had to hit.  This year I plan to attend the group runs and not care if I’m at the back of the pack and again the chest strap can just stay home.  I will certainly run at a comfortable effort and not overdo it, but I don’t need that darn watching beeping constantly.  There are so many great people in both of my groups who are on a similar journey to mine.  I can’t wait to go, share the journey and connect on my first run tomorrow morning!

Next, I need to balance my training.  I’m not giving up on heart rate training because I know the research shows it is right for me.  Instead of doing only heart rate based runs, I plan to do a mix of different types of runs.  This should increase my motivation and rekindle excitement about running.  I plan to reread Matt Fitzgerald’s 80/20 book and work out a training plan that works for me.  The premise of the plan is to balance your training for growth, including tempo, easy and long runs.  I used to love running pick ups after each miles they really made it more interesting and spread the speed work across miles, helping me improve my pace without overtaxing my body.

I’m also really looking forward to doing some local fun runs this year.  I had stopped doing them in favor of doing larger races.  Since NYC marathon is my goal race this year, my focus is solely on that race.  I am not planning to do a lot of other races, just local races that I can enjoy.  There are so many wonderful races right here on Staten Island that I truly enjoyed in the past.  No stress with traffic or parking, just convenient fun workouts.  The first of these races is rapidly approaching and I’m super excited to do it with my team – Little Red Runners.  This will be our third year running this Memorial Day race and this year they’ve improved the after party.  Here’s our beautiful team at last year’s run:

13321930_1625238941069228_8012277294065960063_n

Finally, I’m coming to accept that I am a slow runner, always have been – even in my twenties.  It’s truly fine because an eight minute mile and a thirteen minute mile are truly the same thing – a mile.  It really doesn’t matter how long it takes, it matters that I’m doing it. I can put to rest this quest to run an eight minute mile because for now it’s just not going to happen.  I can’t make pace my priority anymore as it only serves to make me feel bad about myself.  Anything that removes enjoyment from my run is no longer welcome.  This journey is about being healthy and I’m not winning any race anytime soon.  My goal has always been to finish the race and stay healthy.  I have to go back to reminding myself of that.  I’ve even washed my favorite shirt and will likely wear it to the Memorial Day race in a few weeks.

FullSizeRender-2

What’s holding you back from fitness growth?  Is it the bullshit stories you’re telling yourself?  Please share below and let’s get back on track together.

Book mentioned in article:

80/20 Running: Run Stronger and Race Faster By Training Slower

Recipe Swap – Chicken Pad Thai

I’ve been branching out and trying new recipes that I’ve never cooked before.  I’ve heard so many good things about Thai food, but have yet to try it.  I saw an easy recipe that I thought might be something I’d enjoy.  I decided against purchasing a ready made Thai sauce as I was unable to pronounce many of the ingredients listed on the label.  I used a recipe for homemade Thai sauce found below.  I did not include noodles, but I’m sure you could.  The recipe was super easy to follow and quick!  The whole process took about 30 minutes.  It will be perfect for a work night stir fry and no I don’t have a fancy wok – yet.  The taste of this was delicious, but it was a bit hot which I love.  I’m thinking the heat came from the serrano pepper and not the sauce, so go easy on that if you prefer it milder.

Pad Thai Sauce:

Ingredients:

  • 2 tbsp coconut yogurt
  • 3 tbsp. ketchup
  • 1 tbsp. coconut aminos (healthier alternative to soy sauce)
  • 1 tbsp. raw honey
  • 1 tsp. organic hoisin sauce
  • 1⁄4 tsp. sesame oil
  • 1⁄2 tsp. garlic powder
  • 1⁄2 tsp. organic ginger (I used minced ginger in jar)
  • 1⁄2 tsp. black pepper
  • 1⁄2 tsp. organic cilantro
  • 1⁄2 tsp.  no-salt seasoning

Directions:

1. In a bowl combine all ingredients and set aside until needed for your stir fry.   Copyright © 2016 Danette May and Mindful Health, LLC

Chicken Stir-Fry:

Ingredients:

  • 4-6 oz. chicken, cubed
  • 1 small serrano pepper, minced
  • 2 tbsp. Pad Thai sauce
  • 1 cubed organic zucchini
  • 1 chopped organic red bell pepper

Directions:

  1. In pan, add 1 tsp. extra-virgin olive oil, zucchini, red bell pepper, chicken and minced Serrano pepper. Cook until chicken browns and is fully cooked. (I actually had leftover grilled chicken that I cubed so it was done real fast.  I cooked the vegetables for a bit first, then added the cooked, cubed chicken to warm.)
  2. Add pad thai sauce.
  3. Stir and warm.

Copyright © 2016 Danette May and Mindful Health, LLC

This was a meal by itself, no sides required but you could make a nice garden salad with it.  Be sure you have something to put out the fire in your mouth.  I drank ginger kombucha.

If you try this recipe, please let me know how you liked it.  It was part of a 30 day meal program I participated in recently with Danette May.

Some ingredients needed:

Nutrifera Organic Coconut Coconut Aminos 12.7 fl oz (375 ml)

Lee Kum Kee Hoisin Sauce, 20 oz


NoSalt Original Sodium-Free Salt Alternative 11 Ounce (Pack of 2)


Recipe Swap – Creamy, Spicy Coleslaw

I am a recent coleslaw lover much to the surprise of my husband who has spent 34 years hearing me say otherwise.  He’s feeling sad thinking that when we go to a diner I will no longer give him my share of it.  He really shouldn’t worry though because I won’t be indulging in a mayonnaise laden version of this staple side dish anytime soon.  I have tested a few healthier, lighter versions and found one that I’m especially loving so I’ll be eating my coleslaw right here in my home.

My first taste of coleslaw came recently at a dinner out.  It was on top of a pulled pork slider and man was I sold on it after the first bite.  I haven’t tried the pulled pork recipe hunt yet, but quickly got after a coleslaw recipe I’d enjoy.  Here’s what I’ve settled on for now.  Spicy, tangy and crunchy while reducing some of the mayonnaise fat.  I served it last night on top of some grilled chicken and boy was it a hit around here.

Spicy Coleslaw Recipe

  • 4 cups shredded cabbage (I used green already shredded organic coleslaw mix)
  • 1 cup shredded carrots
  • 1 medium onion sliced
  • 6 oz cottage cheese (I used goat cottage)
  • 1/4 cup mayonnaise
  • 1/4 cup dijon mustard
  • 1/2 tsp cayenne pepper
  • 2 tsp apple cider vinegar
  • 1 cup coconut sugar ( I guess this could be optional but I used it)
  • Optional – add sprinkle of hot sauce (I didn’t but I will next time!)

Directions:

  1. Mix the cottage cheese, mayonnaise, mustard, cayenne pepper, vinegar, sugar until combined well.
  2. Begin to add the shredded cabbage until well coated.
  3. Chill covered for at least 2 hours.

I have some leftover right now in my refrigerator and can’t wait for lunch to crunch on some.  If you try this recipe, or have a version of coleslaw to share, please post it in the comments below.

Ingredients used in this recipe –

Natural Value Organic Sriracha Chili Sauce, 18 Ounce

I have to hide this from my husband who puts it on everything!


NOW Foods Organic Coconut Sugar,16-Ounce

Healthier option for recipes that call for sugar.  It is still sugar and should be used sparingly, but it does have a lower glycemic index.


Training Tip – KT Tape

KT Tape is an elastic sports tape designed to relieve pain while supporting muscles, tendons, and ligaments.  I fell in love with KT Tape following my ankle surgery.  I absolutely swear by it and use it for any run over 5 miles, or any race I run.  It feels like my armor, or protection, which takes my mind off my ankle.

I remember when I first started seeing sports tape on athletes in the summer Olympics in 2008.  I was obsessed with beach volleyball that year and remember seeing it and thinking it made the girls look like such bad asses.  The colorful tape was all the rage that year and I wondered what it was for beyond a fashion statement.  Until I needed it, I never really looked into it.  This tape is thought to reduce pain and injury when applied correctly.  The goal is to support the muscles and tendons and aid in the flow of fluids around the area.  It is also thought to help stop ankles from rolling, but I don’t bank on that and am super careful about the terrain I run on.  It may be all in my head, but I feel more confident about my ankle when I wear it and that is well worth the price and time to apply.

Application of the tape can be tricky at first.  I actually went to a vendor at the expo prior to my half to get it applied properly.  They taught me a few tricks I didn’t know, like how to put compression socks on over the tape without ruining it.  They also told me you can leave the tape on for a few days at a time, even showering with it on, which would save some money I guess.  I don’t leave it on as I’d look mighty funny in my work attire and KT tape designs.

If you have any areas that you are concerned about, or experience discomfort in, I highly recommend you check out KT Tape.  It may just be the tip you’re looking for.  There are so many options to choose from when looking.  I like the KT Tape brand and go for the funky colors to keep it interesting.  I recommend you google some videos on Youtube to learn how to put it on correctly.  This is an important step.  Here’s a sample video of how to tape your peroneal tendon, a common running tendon injury.

If you have a Physical Therapist you are working with, ask her to teach you how to correctly apply the tape.  It is well worth learning proper technique to ensure you are getting the benefits from using.

Let me know if you are a fan, like me, of this tape.  Please leave a comment in the section below.

Here’s the information on the tape I use:

KT TAPE Original Cotton Elastic Kinesiology Theraeputic Tape – 20 Pre-Cut 10″ Strips, Blue

It is absolutely worth buying the precut strips.

Revise the Plan When You Must

Since I broke my three toes on Christmas, I’ve been struggling to get back into a running rhythm.  Anyone who has broken toes can tell you just how painful this injury can be.  I thought I had it under control as I pushed through on the elliptical in my boot and running on the treadmill with super wide shoes.  I laughed in the face of this injury and anxiously awaited warmer weather to get back outside.  Sometimes though, life has other plans.

Following my first outdoor runs, I quickly realized this wasn’t going to be so easy.  I felt like the months of easy treadmill runs did little to maintain my conditioning.  I felt like my foot and ankle were in a constant state of pain.  I felt like it was two steps forward, three steps back.  I felt like my head was spinning with the bullshit stories I tell myself.  Finally, I felt like I had to pull up my bootstraps and get this fixed.  My plans were in need of a major revision.

First, I needed to address the pain in my ankle because that is super scary to me.  I do not ever want to have that surgery again.  I think I knew the trigger for the ankle pain.  Over the winter, I was trying to switch over to zero drop shoes and believe this was putting unnecessary pressure on my peroneal tendon.  The shoes seemed to work fine on the slow runs on the treadmill, but outside training was just not the same.  I’m now back in my trusted Hoka shoes and hoping I didn’t do any damage to the tendon.

Next, my toes are still causing some pain in my foot.  This concerns me greatly and I’m hoping there’s no nerve damage.  I’m trying to incorporate the yoga toes pose back into my cool down protocols, as well as foam rolling religiously and hoping this will help.  If not, I definitely need to get an MRI in the coming weeks.

Finally, I definitely needed to revise my pre training plan to build up my strength for running.  I’ve been trying to get off some extra pounds gained during the long winter break.  Not too bad, just need to get about 10-15 off for my optimum running weight.  This week I’m down 5 pounds using the Weight Watchers app to track my eating.  Again, not a fan of plans but chose this one because I can eat real food that I cook.  I don’t agree with the severe limiting of healthy fats, but I’m incorporating what I know is right for my body with the plan and so far it’s keeping me honest about my food choices.

I’m using the Couch to 5K app to warm up my body and am on week 2 of the plan.  The pain in my ankle is still there at night, but I do feel like it’s subsiding.  As I do the couch to 5K plan (similar to the one I just finished, Run for Weight Loss, but less intense) I reflect on the walk/run strategy.  For now, I think this may be just the perfect revision to my running training.

Run/walk programs are an effective training method that can help increase fitness.  The stigma attached to it is that it’s not “real running”.  This stigma overlooks the fact that when alternating running with walking, you decrease the amount of impact on your body and potentially decrease risk of injury.  Further, using this strategy you recover quicker from your workouts as your body has built in recovery breaks.  It is also a form of interval training and can increase caloric burn during your workouts.

Running as we know is a high impact sport.  The continuous use of any muscle used the same way (running long in my case), increases muscle fatigue more rapidly. Continuing to run with fatigued muscles, will greatly increase the chance of injury.  Knowing this it makes total sense to me to use a run/walk program to build my fitness for the marathon.  During the walk portion of run/walk, your body has a chance to recover – both heart rate and muscular recovery.   Walking using different muscle groups than running and allows for some muscular recovery during these sessions.

Run/walk interval training is easy to implement.  Basically you run for a designated portion of time, followed by walk period, then repeat the cycle a certain amount of times.  The free couch to 5K app tells you when to run or walk.  I find myself looking forward to those beeps during my runs now.  I was worried I’d have trouble running after a walk period, but it’s actually quite the opposite.  I look forward to the run beep knowing it’s only for a short period of time.  Mentally this method is motivating and the time flies by.  My pace is even slightly faster over the long runs as when fatigued my pace tends to slow down to a crawl, often slower than a walk pace.

I’m excited to see if this method helps me get back on track without pain, or injury.  Are there any run/walk converts out there that want to share their story?  I’d love to feature your story here in an upcoming blog.  Let me know and please feel free to leave a comment below.  Looking forward to hearing your stories.

Great read to learn more about this method of training:

The Run Walk Run Method·


Tuesday Training Tip

Anyone who has been to physical therapy knows resistance bands are no joke.  Those little rubber bands that look so simple can really challenge the best of us.  When I was training for my race last year, my trainer recommended I add resistance bands to my routine.  Resistance bands, like those found in any physical therapy routine, are made of rubber and come in many different resistance levels.  I quickly learned just how effective, dare I say muscles you never knew you had, these little bands can be.

When using resistance bands, you can work any muscle group and build strength.  They are great for travel because they are so light and easy to transport.  When used correctly and consistently, they can be used to develop muscle strength without the need for heavy weights and dumbbells.  If you’ve never tried resistance bands, you may be surprised at how much you can do with them.

Resistance bands do not rely on gravity as free weights do.  This means your muscle works throughout all parts of the motion.  They are quite cost effective, do not take up any space in your home and are quite portable.   Further, they can be used to complete full-body workouts that challenge every muscle group in your body.  I generally use them for work on my hips and legs to develop strength for running and can tell you they are no joke.  The trick is to get the right resistance for your current fitness level.

The resistance bands I purchased were color coded.  Others available are made in different thickness, with the thicker bands having the greater resistance.  The easiest test is to see how you feel when you use them.  If you are able to complete the set and not feel anything, they are too light.  If you can’t complete the full range of motion, they are too strong. Use trial and error in conjunction with how your body feels to get the right resistance.  Once you feel you have it right continue increasing the resistance as you get stronger.  I have mine a year and have gone up only two levels, so there is no rush.

Here is the band set I purchased for around $13.00:


  Limm Exercise Resistance Loop Bands – Set of 5, 12-inch Workout Bands – Best for Stretching, Physical Therapy and Home Fitness – Instructional Booklet & Handy Carry Bag


Here’s my coach doing the first short workout (7 minutes) with the bands.


There’s a ton of free videos available online to get started.  I hope you give these bands a try, you won’t be disappointed.  Let me know if you currently use resistance bands and how they’ve helped you develop strength.

Recipe Swap

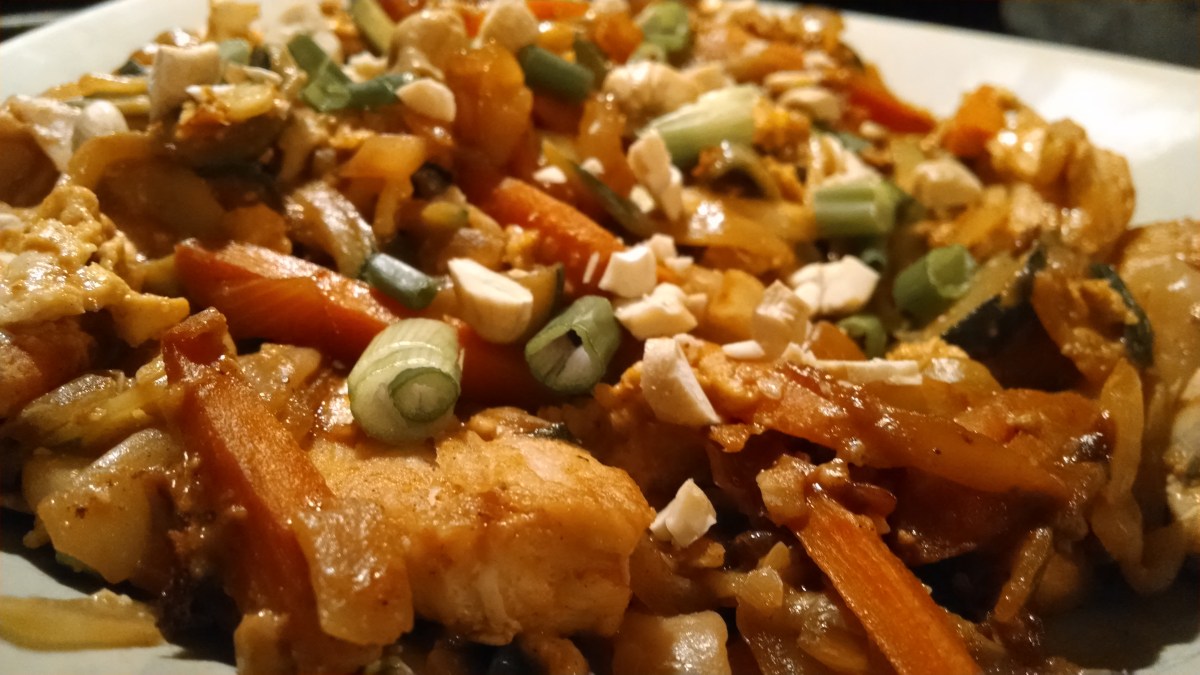
Pizza has long been one of my favorite foods.  I look forward to eating it at least once a week.  When I was younger, I could eat pizza five days a week for lunch and not blink an eye.  I probably could still eat it five days a week, but I’d have to blink both eyes now.

Growing up in Middle Village, everyone ate pizza at Carlo’s Pizzeria.  When we go home, we all flock back to Carlo’s for a slice of the best pizza in New York.  My family really couldn’t afford to order pizza often, but when we did what a delicious treat.  I’m guessing my love affair with pizza can be traced back to those carefree days growing up in the best small town ever.

Flash forward many years and I still love pizza.  I wouldn’t say I ever found a pizzeria that I love as much as my childhood one, but Staten Island has some darn good pizza.  The thing is as I’ve continued on this journey, I’ve worried about the quality of the ingredients being used in these commercial pizza pies.  We all know there are corners to be cut and money to be saved when running a business.  I don’t want my health to be connected to anyones bottom line.  I want to ensure that my pizza is made with the healthiest, freshest organic ingredients out there.  The only way I know to do this is to make it myself.

I’ve been making homemade pizza for years now and I must say once you make the switch you may never go back to store bought.  It’s really not a complicated process and knowing each ingredient used puts my mind at ease.  It’s been a journey of trial and error to perfect the recipe.  When I first started, I was buying the dough already made, but that sort of defeats the purpose of making homemade.  And, please don’t use jar sauce on it either.  If you are committing to your health and taking the time to make the pizza at home, please be selective about your ingredients, as well as toppings.

Here are a few options for the pizza crust, some healthier than others.  If you are not gluten free, consider using my favorite crust.

Ingredients 

  • 1 teaspoon yeast
  • 1 teaspoon sugar
  • 3/4 cup warm water
  • 2 1/4 cups all purpose flour
  • 1⁄2 teaspoon salt
  • 2 tablespoons oil

Directions

  1. Add all ingredients in order listed to your bread machine.
  2. Use Pizza Dough setting
  3. When finished let dough rest for at least 5 minutes before using
  4. Place on lightly greased pizza pan
  5. Add sauce, cheese, etc.
  6. Bake at 400 for 20 minutes (check readiness before removing from oven)

Here’s the directions if you do not have a bread machine, but I highly recommend getting one.  You can also buy a dough attachment for your Kitchen Aid mixer.  I have this as well, but prefer the bread machine as it takes the dough through the whole cycle including rising without me standing there.  Here are the directions if you do not have either of those options,

Directions

  1. Dissolve yeast and sugar in water.
  2. Beat in ½ flour.
  3. Add salt, oil and rest of flour (add more if needed to make handle-able dough).
  4. Rise in lightly oiled bowl.
  5. Place on lightly greased pan.
  6. Add sauce, cheese, etc.
  7. Bake at 400 20 minutes.

Here are two options for dough making at home:

Hamilton Beach Programmable Bread Machine, 2-Pound Bread Maker with Gluten-Free Setting (29882)

Mine is an older version, but I like that this one has a gluten free setting. I may have to upgrade!

KitchenAid Burnished Aluminum C-Dough Hook

Gluten Free Pizza Dough

I experimented with gluten free versions, but since I am not gluten intolerant and only eat pizza once a week I don’t often make it.  Here’s the recipe I found the easiest to make and closest in taste to traditional pizza dough.  Further, it’s one of the only ones that didn’t have an ingredient list a mile long and is pretty darn good.

Ingredients

  • 1 cup white rice flour
  • 1 cup brown rice flour
  • 1 cup tapioca flour
  • 3/4 tsp xanthan gum)
  • 1 tsp salt
  • 1/2 tsp baking powder
  • 3 Tbsp sugar, divided
  • 1 Tbsp yeast
  • 1 1/4 cup warm water, divided
  • 1 Tbsp olive oil

Instructions

  1. In a small bowl, combine yeast and 3/4 cup warm water. Too hot and it will kill the yeast! Let set for 5 minutes to activate.
  2. Sprinkle in 1 Tbsp of the sugar a few minutes in.
  3. In a separate bowl, combine flour blend, salt, baking powder and remaining 2 Tbsp sugar. Whisk until well combined.
  4. Make a well in the dry mixture and add the yeast mixture. Add the olive oil and additional 1/2 cup warm water before stirring. Then stir it all together until well combined, using a wooden spoon.
  5. Lightly coat a baking sheet or pizza stone with non-stick spray and plop your dough down. Using your hands and a little brown rice flour if it gets too sticky, work from the middle and push to spread/flatten the dough out to the edge. You want it to be pretty thin – less than 1/4 inch.
  6. Put the pizza in the oven to pre-bake for roughly 25-30 minutes, or until it begins to look dry. Cracks may appear, but that’s normal and totally OK.
  7. Remove from oven and spread generously with your favorite pizza sauce, cheese and desired toppings. Pop back in oven for another 20-25 minutes, or until the crust edge looks golden brown and the toppings are warm and bubbly.
  8. Cut immediately and serve.

Recipe Credit: Minimalist Baker.com

If I update my bread machine, perhaps I can revisit this recipe and use the machine for the dough.

Cauliflower Crust

I’m including the recipe here, but I’ve only tried it once.  It was just OK for me, but my friends loved it.  I am a traditional pizza girl at heart and if I’m eating it, I want the real deal.

INGREDIENTS

2 pounds cauliflower florets, riced
1 egg, beaten
⅓ cup cheese for topping
1 teaspoon dried oregano
pinch of salt

INSTRUCTIONS

  1. Preheat your oven to 400F.
  2. To make the cauliflower rice, pulse batches of raw cauliflower florets in a food processor, until a rice-like texture is achieved.
  3. Fill a large pot with about an inch of water, and bring it to a boil. Add the “rice” and cover; let it cook for about 4-5 minutes. Drain into a fine-mesh strainer.
  4. THIS IS THE SECRET: Once you’ve strained the rice, transfer it to a clean, thin dishtowel. Wrap up the steamed rice in the dishtowel, twist it up, then SQUEEZE all the excess moisture out! It’s amazing how much extra liquid will be released, which will leave you with a nice and dry pizza crust.
  5. In a large bowl, mix up your strained rice, beaten egg, goat cheese, and spices. (Don’t be afraid to use your hands! You want it very well mixed.) It won’t be like any pizza dough you’ve ever worked with, but don’t worry– it’ll hold together!
  6. Press the dough out onto a baking sheet lined with parchment paper. (It’s important that it’s lined with parchment paper, or it will stick.) Keep the dough about ⅓” thick, and make the edges a little higher for a “crust” effect, if you like.
  7. Bake for 35-40 minutes at 400F. The crust should be firm, and golden brown when finished.
  8. Now’s the time to add all your favorites– sauce, cheese, and any other toppings you like.
  9. Return the pizza to the 400F oven, and bake an additional 5-10 minutes, just until the cheese is hot and bubbly.
    Slice and serve immediately!

Author: Detoxinista.com
A grain-free alternative to traditional pizza crust, that you can pick up with your hands!

This recipe and other easy recipes can be found in this book –

Everyday Detox: 100 Easy Recipes to Remove Toxins, Promote Gut Health, and Lose Weight Naturally

If you have a favorite homemade pizza recipe, please share it below.  I’d absolutely love to try it!


Taking the Plunge

What do you do when you need to try something new?  Do you hesitate, or jump right in?  Do you try every new thing you encounter, or are you cautious and selective?  I am the cautious and selective type.  I like to read and research before taking the plunge, especially when it comes to what I put into my body.  I want to be healthy and not fall victim to the mind robbing disease that has devastated my family.  I must admit it is hard with so many “things” out there.  I get emails, see videos, advertisements on Facebook and encounter people who truly believe in programs on a daily basis.  If I took the plunge each time, I’d be broke and most likely still in the same boat.

The way I stay focused is to remember my why.  My why is to remain healthy, active and maintain my memories long into my 90s.  With this in mind, I must remain careful about what I eat and drink.  My philosophy around nutrition is that food is fuel for my body and the means to remaining healthy.  These weight loss programs sound so darn appealing and I must admit those who have had success are totally passionate and committed to them.  The before and after photographs are so inspiring and I am extremely happy for them all.  But, I just can’t do them.  Those programs are not for me as I don’t want to get my nutrition from powders and pills and often if you dig deep enough the ingredients are not totally pure.

With the exception of Purium, a program which I’ve yet to find any bad ingredients in, most of the other programs have at least one ingredient that just won’t work for me personally.  I did use Purium for a while last year and will say I had no problem buying it.  I truly didn’t mind the expense and it was expensive.  My only problem with some of their drinks was the taste.  For me, they just didn’t taste good.  I am a fan of the Apothe Cherry drink and like to drink that at bedtime.  I found a version that cost less though and has the same impact for me.

Dynamic Health Tart Cherry Turmeric and Ginger Tonic Supplement, 16 Ounce

I mix 2 tbs of this juice with 8 oz of water and drink about 30 minutes before I go to bed.  You can drink it straight, but I prefer to dilute it.

Last week, I told you I was planning to do a 10 day green cleanse and shared the book I use with you.  I cleaned up my act this week for sure, but still was not able to feel totally on track again.  It just feels like there is something every day that gets in the way of my nutrition.  I made better choices and definitely lost 5 pounds, but I’m still not satisfied that I’m fueling my body properly.

This week I attended two days of professional development, not for nutrition mind you.  As part of the presentation, the presenter was sharing his struggles with weight loss.  As he talked, he shared an app that he was using to keep focused.  I am not a fan of programs, but found myself at a center signing up that very afternoon.  I have decided to do this program only because –

  1. I get to prepare and cook my own food.
  2. I don’t have to count or think about anything.
  3. I will get daily feedback on my journey.

I signed up at Weight Watchers not because I need them to tell me how to eat, what to eat or why to eat that way.  Believe me I know that already.  I signed up because they have made it so easy to monitor what I am doing on a day to day basis.  I love the app (yes I know I could just use a free app) and how simple they have made it to track my day.  Yes, the program is about tracking points and that’s just fine.  Yes, I’m aware that it really is about counting calories and portion control.  Yes, I know that I need to eat healthy fats and this program attempts to limit that, but I think I can make this work to keep me focused and get me back on track.

Right now, I can eat 30 points a day.  My superfood coffee counts as 9.  Though they would encourage me to swap that out, I know I need the healthy fat it contains and that in the long run it connects to my why.  I am able to eat vegetables and fruits as low point and no point options.  So, of course you know this will motivate me to increase my intake of those foods from my least favorite food group.  The best feature of all is I don’t have to convert or count anything to figure out points.  I get to simply scan the barcode and it’s there, or type in the food.  Thank you for this wonderful feature!  Lastly, you get points to swap the more you move which sure motivated me to take an extra walk last night with my dog.

Am I excited about the program itself, not so much.  Am I excited to have a focus to get me ready for training, yes!  This sign up for me was for a 3 month pass.  Just enough time to get ready to toe the line for my marathon training program which officially starts in June.

I’d love to hear your success and failure with Weight Watchers.  Please feel free to share below, or shoot me an email.

Recipe Swaps

Recently, I tried farro for the first time.  Farro is an ancient grain that is a nutritious, high fiber, low gluten choice that is gaining in popularity.  You can add farro to soups in place of other grains.  It has a chewy texture that kind of reminded me of pasta in my dish.  I was pleasantly surprised by the taste and texture.  As an added benefit, farro offers lots of fiber, B vitamins, zinc, iron and even a good dose of protein.

I tried farro in a side dish for a dinner party I hosted.  I used a recipe published by Ina Garten, who never fails to deliver!  I’m sure there are likely many healthier ways to cook the farro, but this recipe was worth making. You can swap the bacon for turkey bacon if you wish, but I used uncured natural bacon and it was simply delicious.  Added such a nice flavor.  For the parmesan, I used a goat version.  It was filling and a hit with my crowd and I think it could actually serve as a meal on it’s own.

Baked Farro & Butternut Squash Recipe by Ina Garten

Ingredients

6 thick-cut slices applewood-smoked bacon – (*I didn’t use 6 slices, I used 3)
2 tablespoons good olive oil (*I used 1 tablespoon of avocado oil)
1 tablespoon unsalted butter
1 1/2 cups chopped yellow onion (1 large)
2 teaspoons chopped fresh thyme leaves
Kosher salt and freshly ground black pepper
1 1/2 cups pearled farro
3 cups good chicken stock, preferably homemade (*I used organic chicken bone broth)
3 cups (3/4-to-1-inch-diced) peeled butternut squash
1/2 cup freshly grated parmesan cheese (*I used goat parmesan)

Directions

Preheat the oven to 375 degrees F.

Place the bacon on a baking rack set on a sheet pan and bake it for 20 to 30 minutes, until browned (it won’t be crisp). Dice the bacon.

Meanwhile, in a small (9-inch) Dutch oven, such as Le Creuset, heat the oil and butter over medium heat. Add the onion and cook for 6 to 8 minutes, until tender and starting to brown. Add the thyme, 2 teaspoons salt and 1 teaspoon pepper and cook for 1 minute. Add the farro and chicken stock and bring to a simmer. Place the squash on top of the farro mixture, cover, and bake in the same oven with the bacon for 30 minutes, until the squash and farro are tender. Check once during cooking and add a little chicken stock if it’s dry.

Sprinkle the bacon and parmesan on the squash and farro and bake uncovered for 15 to 20 minutes, until most of the liquid evaporates, the farro and butternut squash are tender, and the cheese has melted. Serve hot directly from the pot.

This stored nicely in my refrigerator for 2-3 days.  I highly recommend you give it a try.  I’ve also been experimenting with adding cooked farro to my salads instead of beans.  I’d love to hear more about what you do with farro.  Please leave a comment below.

Recipe credit – Ina Garten

Make It Ahead: A Barefoot Contessa Cookbook